


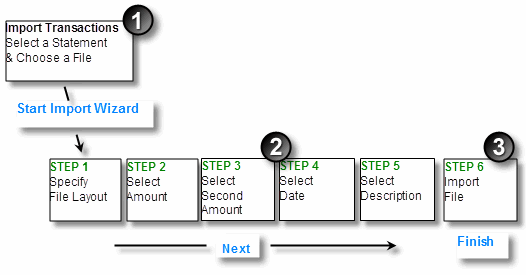
The first part to the import process allows you to the select the statement you want to update, and to choose the import file that contains your transactions (1).
The import wizard will then take you through the steps needed to specify the layout of your import file, and to map the columns in your file to the information required to create the transactions (eg the amount, date, description, etc) (2).
The final step is to physically import the file, where your transactions are automatically loaded into the nominated statement (3).
This section contains step-by-step instructions on importing a CSV file into a statement.
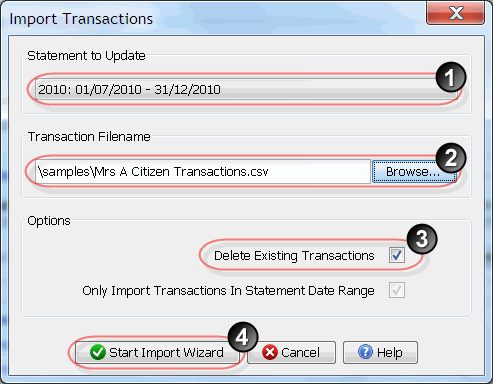
To start the import process click on the Import Transactions button on the toolbar (or from the Action menu choose Import Transactions).

The Import Transactions screen requires that you:
As you work through the import wizard steps you will notice that each step has the following screen components:
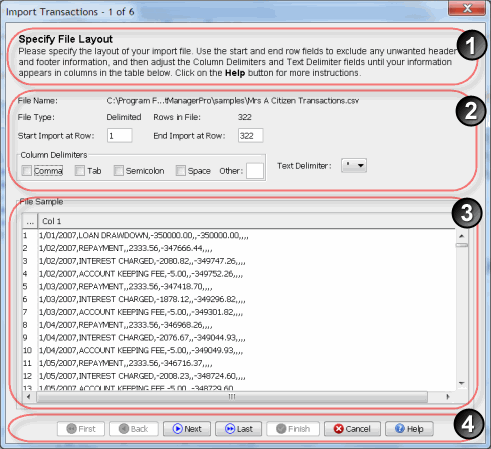
The first step of the Wizard requires that you to specify the layout of the file you wish to import. If your file contains unwanted header or footer information then you can exclude them by changing the start and end row fields.

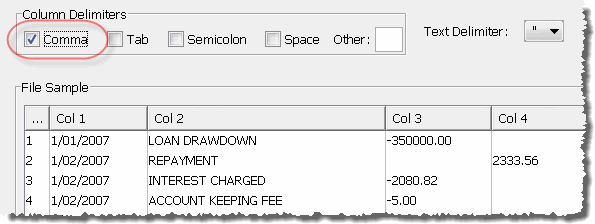
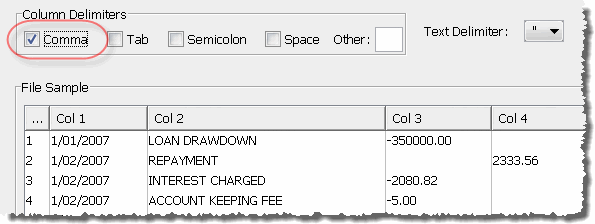
Adjust the Column Delimiters and Text Delimiter fields until your information appears in columns in the File Sample table. The most common file formats are Comma Separated Values (CSV) files where the information is separated by commas, and Text files where the information is separated by Tab characters.
For CSV (.csv) files select the comma delimiter, for Text (.txt) files select the Tab delimiter.
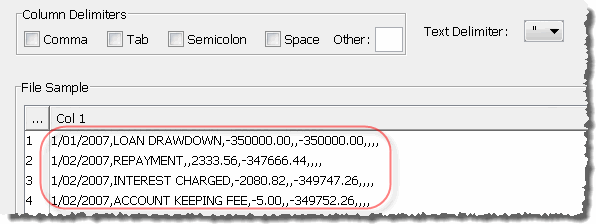
As the information in our sample file is in CSV format, selecting the comma delimiter places the information neatly into columns.
Click on the Next button.
Once your import file is being displayed as columns in the File Sample panel, select the column that contains the transaction amounts. If you have two columns with transaction amounts (for example, debits and credits), select the first column. You can do this by typing in the column number into the field provided (1), or by clicking on the column in the File Sample panel (2).
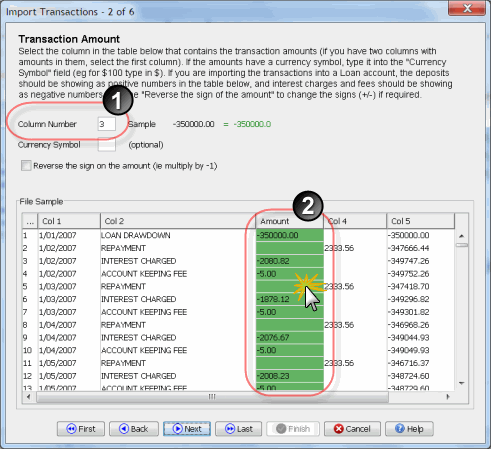
If the amounts in your file contain a currency symbol (for example $, £, ¥, A$, Z$, Rp, etc) then type it into the currency symbol field.

IMPORTANT - If you are importing transactions into a Loan or Mortgage statement, then deposits should be displayed as positive numbers, and the interest charges and fees should be displayed as negative numbers in the File Sample panel.
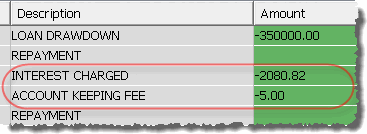
If they are currently being displayed incorrectly then select the "Reverse the sign on the amount" field to change them.

Click on the Next button.
If all your transaction amounts are displayed in the one column, then you can skip this step. If you have two columns with transaction amounts in them, then choose the second column. If required, enter the currency symbol and change the signs on the amounts (+/-).
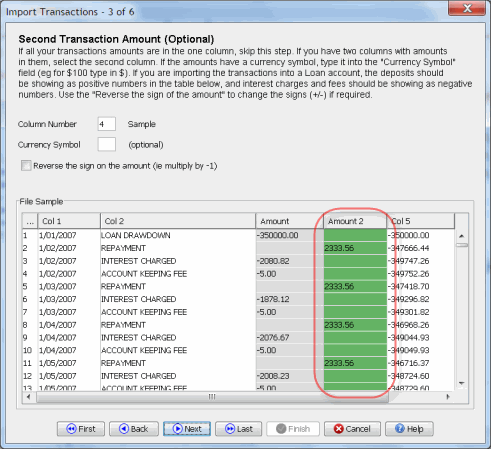
Tip - If you have two columns with amounts (for example, debits and credits) it doesn't matter in which order you assign them to Amount and Amount 2. The important thing to check is that the numbers in each column have the correct sign (+/-), adjusting them with the "Reverse the sign on the amount" field if required.
Click on the Next button.
Select the column that contains the transaction dates.
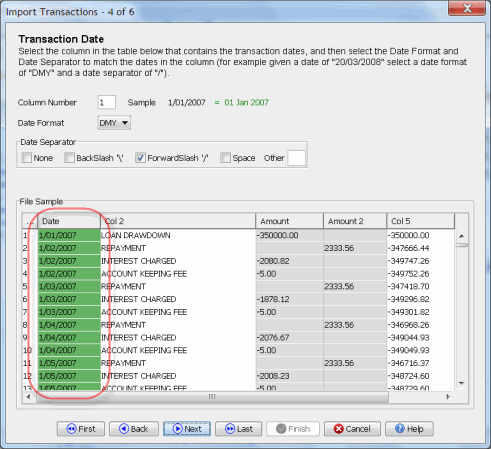
Select the Date Format (1) and Date Separator (2) to match the dates in the column (for example, given a date of "20/03/2008" select a date format of "DMY" and a date separator of "/")

Click on the Next button.
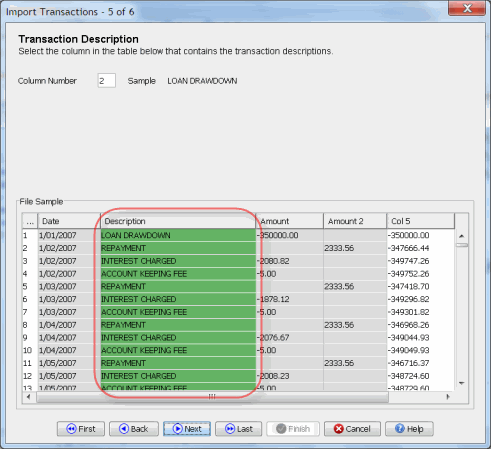
Select the column that contains the transaction descriptions.
Click on the Next button.
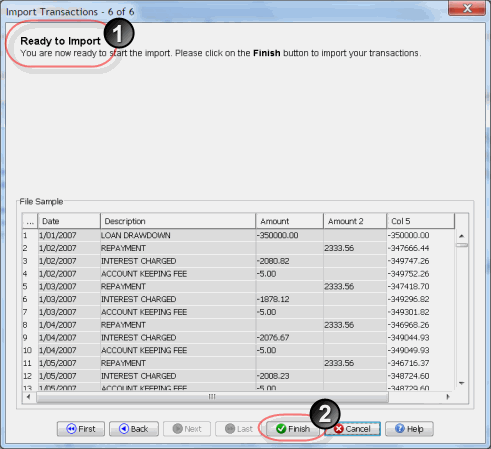
If you have correctly specified a column for each of the required fields, step 5 will show you the Ready to Import message (1). Start the import by clicking on the Finish button (2), and if everything is valid the transactions will be loaded into the statement.
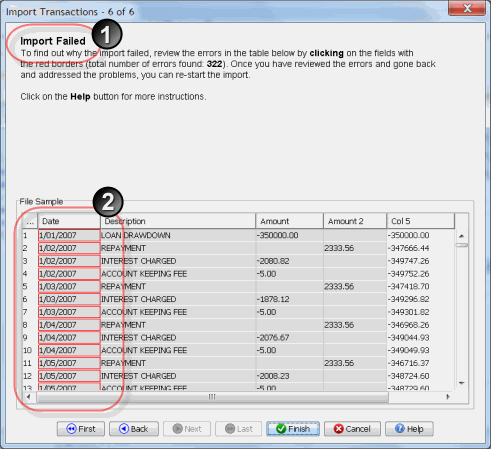
If any of the values you have selected are incompatible with the import file, then you will see the Import Failed message (1). To find out why the import failed, review the errors in the File Sample panel by clicking on the fields with the red borders (2). Once you have reviewed the errors and gone back and addressed the problems, you can re-start the import.
The import wizard allows you to import delimitered text files (where the information in your file is separated by a delimiter). Your import file can contain one of more delimiters, including commas, tabs, semicolons, spaces, etc.
The most common file formats are Comma Separated Values (CSV) files where the information is separated by commas, and plain text files where the information is separated by Tab characters.
A CSV file is simply a text file where the information is separated by commas. The format dates back to the early days of business computing, is very simple and widespread, and is supported by almost all spreadsheets and financial software packages. In addition most Internet banking sites provide the option of downloading information in CSV format.
You can find an example of a CSV file in the samples directory of the software. If you open this file in a text editor you will notice that commas separate the transaction information.

If you want to import a CSV file into the software you need to select the Comma as the Column Delimiter. This will allow the wizard to put each value into a separate column ready for importing.
Most banks allow you to view your transactions online via their Internet banking site, and provide you with the option to download your transactions to a CSV file.
When viewing your transactions online, look for the download or export option and select the CSV format (other names for the CSV file format include: CSV text file, Comma Separated Values (CSV), Spreadsheet file, Plain Text file). If you can't see any of these options please contact your lender for more information on how to download your transactions into a CSV file.
Once you have downloaded your transactions and stored the file on your computer, it is ready to load directly into the software using the import wizard.
Most spreadsheet packages provide you with the option of saving your work as a Comma Separated Values (CSV) file. Therefore all you have to do is save your spreadsheet as a CSV file, and then you can load it directly into the software using the import wizard.
